When I first started using Screaming Frog for technical SEO, I had so many questions. Where do I begin? How do I set up my audit?
Which issues should I focus on first, and how do I fix them? If you’re feeling the same way, don’t worry—you’re not alone.
In this post, I’ll show you how to get started with Screaming Frog, understand the results, and tackle the most important problems on your website.
P.S. This article is an ongoing series on technical SEO audits for beginners.
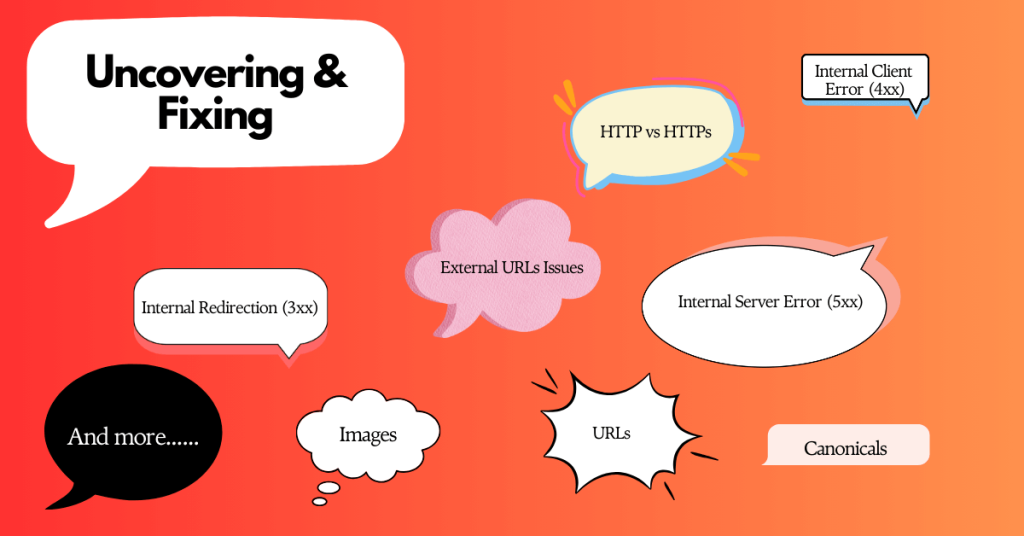
My Process
Getting Started
Screaming Frog (SF) is a powerful SEO tool that simulates Google bots’ crawling to help you understand issues Google bots encounter or may encounter while crawling your website. The tool is sometimes called a crawler, spider, web crawler, Google bot simulator, etc.
To use this software, start by downloading and installing Screaming Frog.
Once you have downloaded the software, the next thing you’d want to do is configure the crawler to your needs.
Configuring with Screaming Frog
The configuration of a crawler depends on the objective of your audit.
I aim to uncover content and technical SEO issues in this blog post.
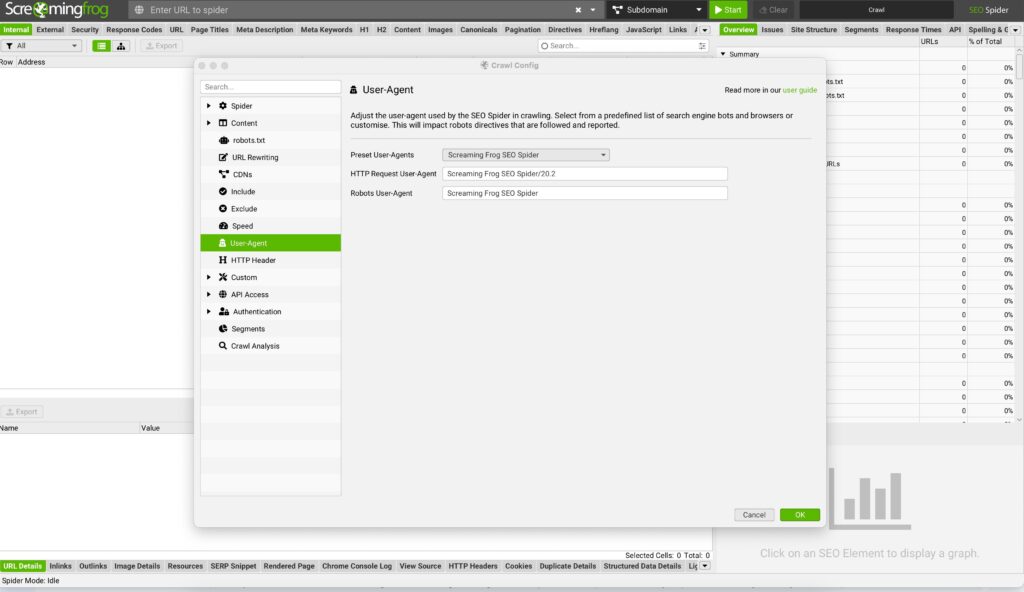
So, I start by switching the user agent to Googlebot Mobile to see the website as Google does.
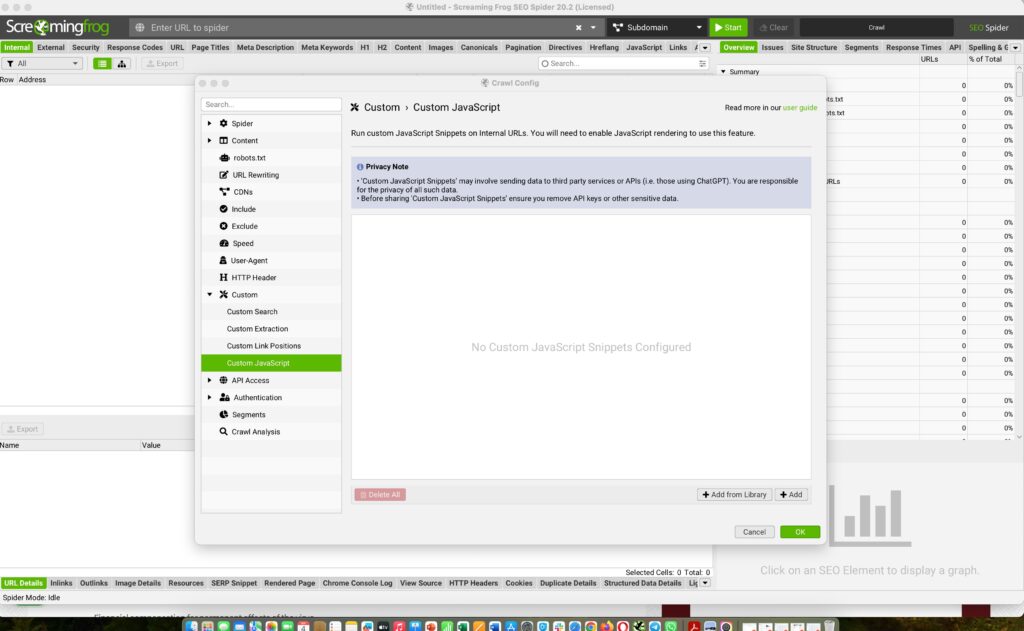
Next, I set it up to crawl the site’s JavaScript, ensuring nothing is left unseen.
Finally, I input the URL into a grey box that says, “Enter URL to Spider.”
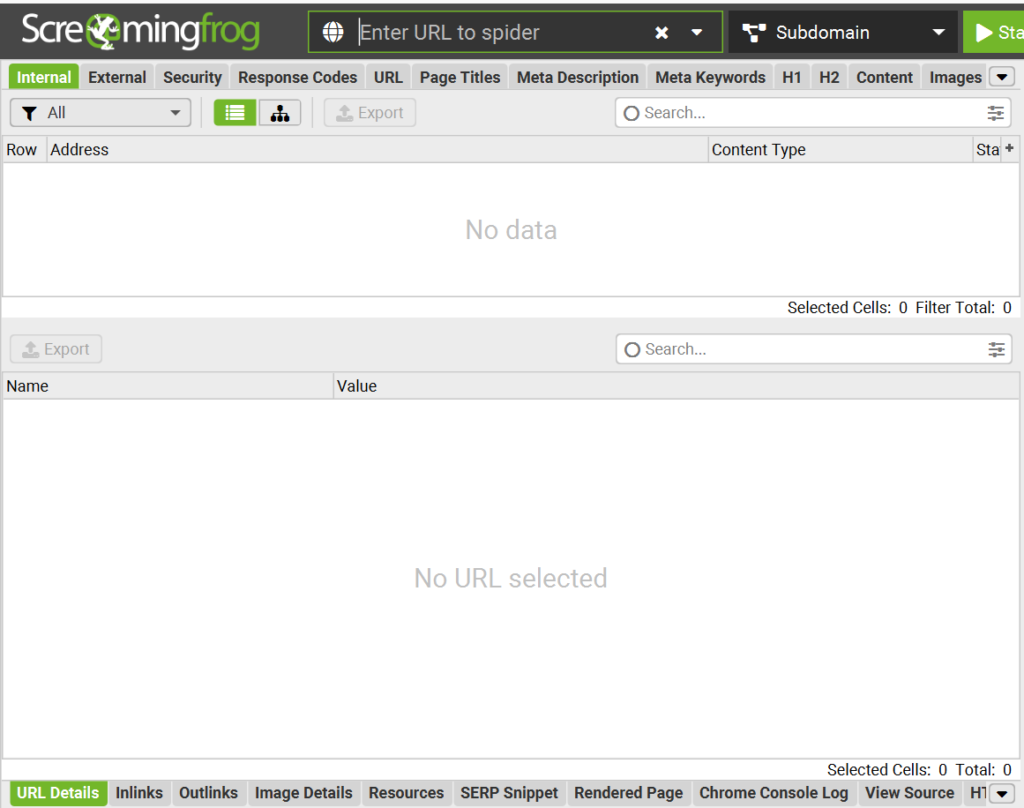
The drop-down arrow allows you to crawl specific subdomains if you wish. But, by default, it’s set to “All Subdomains,” meaning it will crawl your entire site. You can change this to focus on just one URL or the subdomain/subfolder you’ve entered.
For this blog post, I choose to leave it to default. Once I am ready, I hit the green ‘’Start’’ button to begin the crawl.

The time it takes for an audit depends on the number of URLs you want to review and your computer’s speed. If you’re crawling a large website with thousands of pages, it can take a few hours.
Screaming Frog includes a progress bar to monitor how far along the audit is. Plus, you can pause the scan anytime if you need a break.
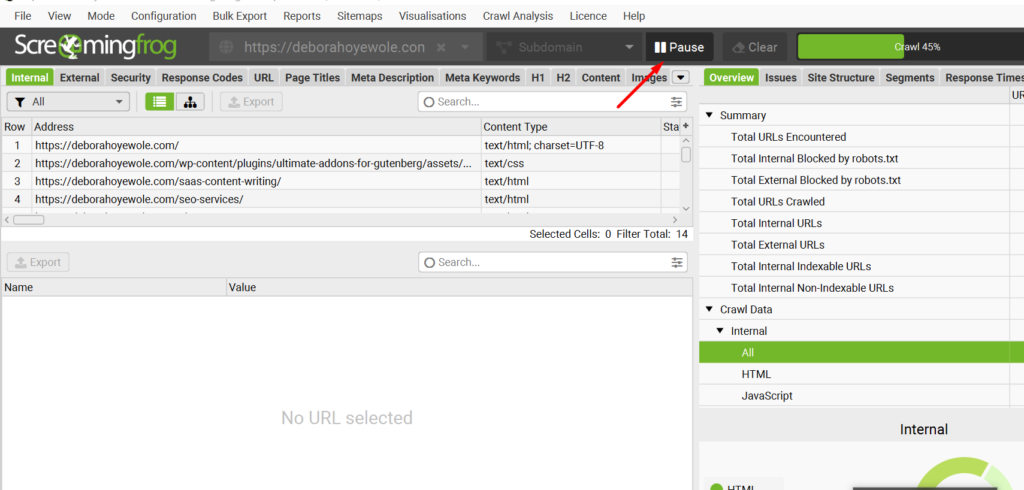
It is also important to note that there are configuration limitations with the free tool.
However, the paid version allows you to
- Change the user agent – the crawler you want to simulate. Available ones are Screaming Frog SEO Spider, Googlebot, Bingbot, various browsers, and more.
- Choose to store and crawl images independently.
- Choose to store and crawl JavaScript files independently and more.
For extra resources, here’s a helpful guide on configuring the Screaming Frog SEO tool for your audit needs.
When the crawler finishes its job and gathers all the URLs, the next thing to do is to examine every identified issue.
Common SEO Issues and How to Solve Them Using Screaming Frog
For ease of understanding, I classify my issues based on two sections.
- Technical issues
- Content issues
Technical issues are problems with your website’s infrastructure, like broken links or slow load times.
Content issues, on the other hand, are related to the quality and relevance of the text, images, and other media on your site.
Uncovering Technical Issues using Screaming Frog
Start with the “Overview” section of Screaming Frog.

This is where all the issues you need to investigate are listed in an easy-to-view manner. Here, some of the common errors you’d encounter are:
- 301s
- 404s
- 5xx
- Broken External URLs
- HTTP vs HTTPS
- HTML
- JavaScript
- Blocked by Robots.txt
- Blocked Resources
- Content Metadata such as H1, H2, Meta Descriptions, Page Titles
- Images
- URLs
- Canonicals
- Pagination
- Hreflang
- Links
- Structured Data
- Redirection Chain
I’ve listed the above errors as the basic starting point to get you started. Now, let’s begin unfolding each element.
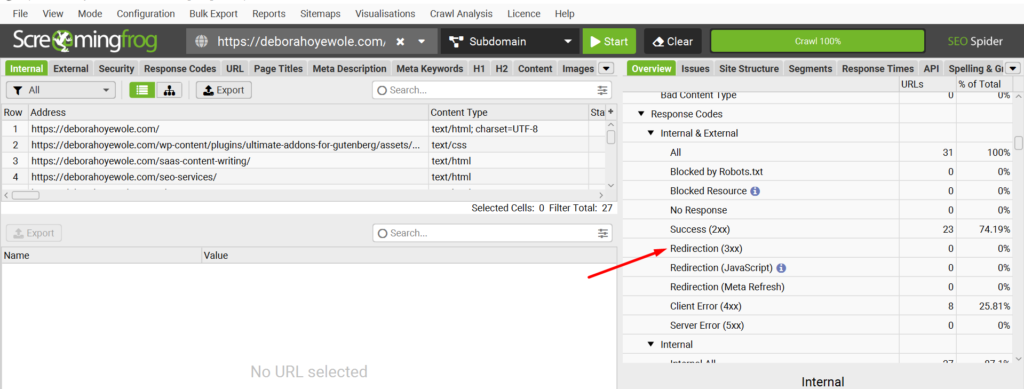
Internal Redirection (3xx)
Screaming Frog shows 3xx just to signal the issue is about an internal redirection. To figure out which type of redirect (whether temporary, permanent, or others), just click on the “Internal Redirection (3xx)” button. You’ll then see the affected URL lists on the left side of the page.
Brief Explanation
- 301 signifies a permanent redirection. Simply, it means a page has been permanently moved to another page.
- 302 signifies a temporary redirection, meaning the page temporarily leads to a new page.
What to Do
- On the left-hand side, check the URLs and export them all (We will analyze them later).
Possible Fix
- If deliberately implemented, 301 and 302 redirects are normal on a website. The only redirections that need a quick fix are redirection chains or redirection loops. We’ll look at them in this section.
- To deal with a redirect chain, you need to identify all the links in the chain. Then, update the original link to point directly to the final destination page. This eliminates the unnecessary steps in between and ensures a smoother user experience.
For example, your redirect URL should look like this;
https://example.com/page1 → http://example.com/page/2
and not
http://example.com/page1 → http://example.com/page/ → https://example.com/page1/ https://example.com/page2/
Internal Client Error (4xx)
The XX used here is the same reason as mentioned above, as there could be 404, 405,406, 407.
Explanation
- 404 Not Found: Implies that the page has been removed. It can’t be found on the server any longer. It may have been deleted, or some technical issues could have led to the 404 error.
- 405 Method Not Allowed: The request method is known by the server but has been disabled and cannot be used. For example, trying to submit a form using an unsupported HTTP method.
- 406 Not Acceptable: The requested resource is capable of generating only content not acceptable according to the Accept headers sent in the request.
- 407 Proxy Authentication Required: Similar to a 404 Unauthorized status, it indicates that the client must first authenticate itself with the proxy.
For this article, we’ll focus on fixing 404 issues.
What to Do
- On the left-hand side, review the 404 URLs and export them.

Possible Fix
- Update Links: For each broken link, find the correct URL and update the link to point to the correct destination.
- Remove Links: If the content no longer exists and there’s no suitable replacement, remove the broken link entirely.
- Set Up Redirects: If the page has moved, set up a 301 redirect from the old URL to the new one. This ensures users and search engines are directed to the correct page.
Internal Server Error (5xx)
If you’re seeing URLs with a 5xx error, such as 500, 502, 503, etc. It means there was a server error when trying to load the identified pages. A 500 status code error indicates an internal server error, meaning something went wrong on the server.
What to Do
- Copy one of the URLs and paste it into your browser to verify if the page loads. The page may look like the image below if there’s a server error.
- On the left-hand side, export all the affected URLs.
Possible Fix
- Check server logs for detailed error messages. Common solutions include checking for incorrect configurations, syntax errors in code, or insufficient server resources.
To check server logs and address issues, follow these steps:
- Access Server Logs:
- For Apache Servers: Look in the error log file, usually found in /var/log/apache2/ or /var/log/httpd/.
- For Nginx Servers: Check the error.log file in /var/log/nginx/.
- For Other Servers: Refer to your server’s documentation to find where logs are stored.
- Review Error Messages:
- Open the log file and look for recent entries corresponding to the error’s time.
- Note any specific error messages or codes, as these will guide you to the underlying issue.
- Fix Incorrect Configurations:
- Check your server configuration files (e.g., httpd.conf for Apache or nginx.conf for Nginx) for errors.
- Ensure that file paths, permissions, and directives are correctly set.
- Correct Syntax Errors in Code:
- Review your website’s code or scripts for syntax errors or bugs.
- Use development tools or a code editor with syntax highlighting to spot issues.
- Address Insufficient Server Resources:
- Check your server’s resource usage (CPU, memory, disk space) using monitoring tools or commands like top, htop, or df -h.
- If resources are low, consider optimizing your applications or upgrading your server’s hardware.
External URLs Issues
You may not need to focus too much on this external issue since it shows every external link on your website, whether on your blog or elsewhere. However, it’s still important to check for flagged errors so you can decide what to do.
Here, I’d like to address the external client error.
- External Client error (4XX): This 4XX error is important to flag in your audit because these external domain pages you linked to have been deleted. You didn’t delete or remove these pages. The website owners did.
Illustration of a Typical External Client Errors:
- Initial Link:
- Website A links to a page on Website B with the URL https://example.com/blog/about-explanation/.
- URL Change:
- After a few days, months, or years, Website B changes the URL of that page to https://example.com/blog/about-explanation-introduction/ for various reasons (e.g., content updates, SEO improvements, or restructuring).
- Resulting Error:
- If Website A is unaware of this change and doesn’t update the link, the original URL (https://example.com/blog/about-explanation/) will lead to a 404 error, meaning the page cannot be found.
What to Do
- On the left-hand side, export all the affected URLs.
Possible Fix
- Check the referring link to understand where the broken link or 404 errors are coming from. This will help you decide the best course of action. You can use the Screaming Frog’s Inlinks section to uncover this.
- Determine if the missing page was deleted, moved, or if there’s a typo in the URL. Below I outlined how to do that.
Check if the Page Was Deleted:
- Visit the URL: Try accessing the URL directly in your browser. If it’s not found, the page may have been deleted.
- Consult the Site Admin: Check with the site administrator or the content team to confirm if the page was intentionally removed.
Check if the Page Was Moved:
- Search the Website: Use the website’s search feature or navigation to see if the content has been moved to a different URL.
- Check for Redirects: Sometimes, a page is moved but a redirect is set up. Check if there’s a redirect in place that directs users to the new URL.
Check for Typos in the URL:
- Review the URL: Look for common mistakes like misspellings or incorrect paths in the URL.
- Compare with the Correct URL: Verify the URL against the correct one, if you have it, to spot any discrepancies.
Update the External URL:
- Edit the Link: Once you have the correct URL, update the external link on your site to point to the live page.
- Test the Link: Ensure that the updated URL works correctly and leads to the intended content.
HTTP vs HTTPS
HTTP (HyperText Transfer Protocol) allows the transfer of information between a web server and a browser, but it’s not encrypted, making websites with only HTTP vulnerable to attack. HTTPS, on the other hand, is the secure version recommended for all websites. HTTPS is also a lightweight ranking factor in Google.
What to do
- You can check for URLs with HTTP in SF, by checking the Security section of the Overview tab.
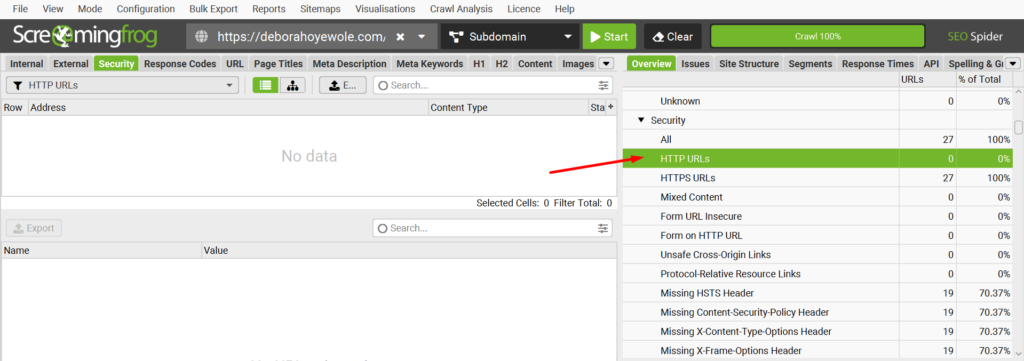
- Next, identify and export them. Also, if there are URLs with both HTTP and HTTPS versions, it may result in duplicate content and expose the website to cyber threats.
Possible Fix
- You can work with your developer to set up 301 redirects to HTTPS to enhance security and avoid potential HTTP errors. Alternatively, you can download plugins like Verpex, 301 redirects, etc.
Images
Under this section, you’ll be able to see all the images on a website. SF will flag issues about image size and alt text.
What to do
- Review images in the over 100KB and export them
- Do the same for those with missing alt text, alt text above 100 characters, and incorrectly sized images.
Possible Fixes
- Compress images to reduce their file size without compromising quality. Use tools like TinyPNG or Photoshop to optimize images for faster loading times.
- Add descriptive alt text to each image. This improves accessibility and helps search engines understand the content of your images. You can use an alt text generator like alttext.ai to streamline bulk alt text writing if you have a ton of images that need alt text on your site.
- Shorten Alt text to be concise yet descriptive. Aim for clear, meaningful descriptions that are under 100 characters.
- Resize images to match the dimensions needed on your website. Modify CSS elements or image editing tools to ensure images are displayed at their optimal size without distortion.
For this image section, we want to make sure we’ve considered all relevant image optimization best practices.
URLs
For this section, we want to analyze URL structures. This is because URLs are one of the first elements search engines use to determine what your site is about. So, you need to ensure your URL is clean and descriptive, making it easier for search engines to understand the page’s content and relevance.
Under SF’s overview, check for underscores, upper case, slashes, repetitive paths, space, and URL parameters in this section.
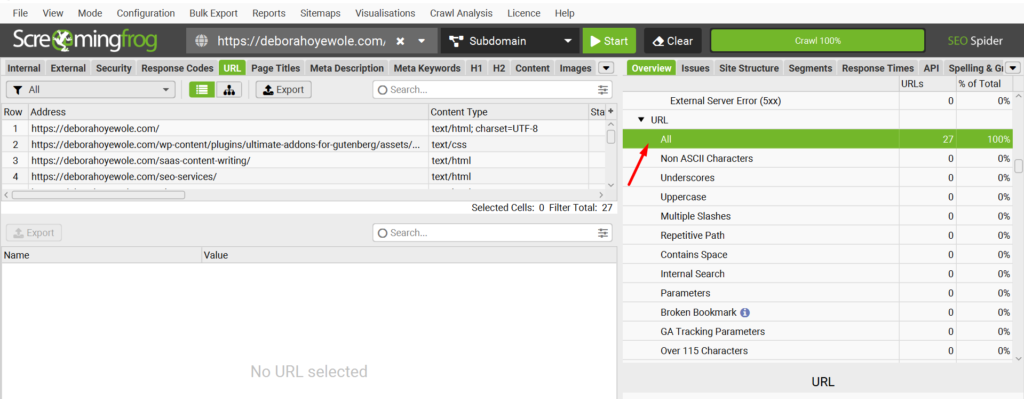
See the examples below to understand each issues in real life.
- Underscores: https://example.com/blog_post_title_here
- Upper case: https://example.com/BlogPostTitleHere
- Slashes: http://www.example.com//multiple//slashes
- Repetitive path: http://www.example.com/repetitive/path/repetitive/path
- Space (encoded as %20 in URLs): http://www.example.com/page with space http://www.example.com/page%20with%20spaces
- Parameters: http://www.example.com/page?param1=value1¶m2=value2
What to do
- Export all the affected sections under the URL.
Possible Fixes
- Underscores: Replace underscores with hyphens for better readability and SEO, e.g. https://example.com/blog-post-title-here.
- Upper case: Use lowercase letters for URLs to ensure consistency and avoid potential duplicate content issues, e.g., https://example.com/blogposttitlehere.
- Slashes: Remove extra slashes to create clean URLs, e.g., http://www.example.com/multiple/slashes.
- Repetitive Path: Simplify the URL to remove repetitive segments, e.g., http://www.example.com/repetitive/path.
- Spaces (encoded as %20): Replace spaces with hyphens to create more user-friendly URLs, e.g., http://www.example.com/page-with-space.
- Parameters: Minimize the use of parameters by using descriptive, static URLs whenever possible, e.g., http://www.example.com/page/param1-value1/param2-value2.
Canonicals
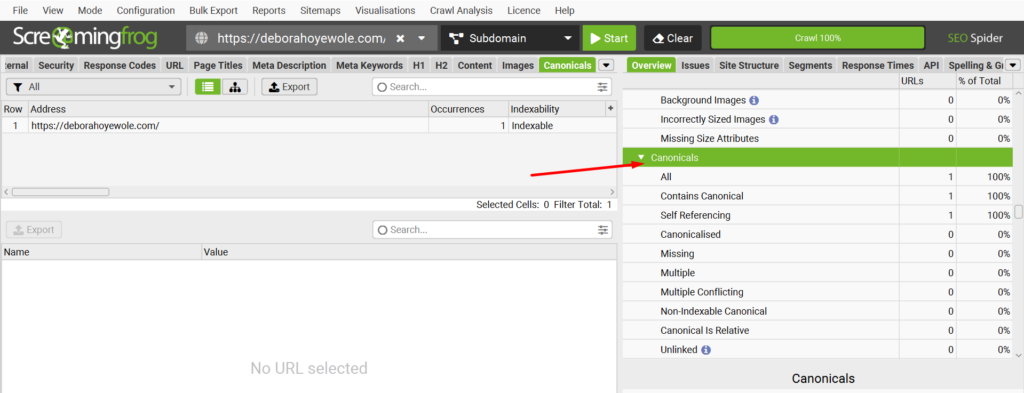
This section explores how effectively you’ve communicated each page’s originality to Google Search. This means that every URL we intend for Google to index should have a canonical tag. This tag helps Google recognize the preferred version of a page, even if it encounters duplicates elsewhere on our site.
Consequently, all URLs should include self-referential canonicals, indicating to Google that they are the authoritative versions.
What to Do
- Check for missing canonicals, canonicalized, multiple, non-indexable, unlinked canonicals, and self-referencing.
- It’s normal for URLs to self-reference themselves as canonicals. So, this is not an issue. However, comparing the number of self-referenced URLs to the number of all URLs under the canonical section is critical.
Let me explain why.
Checking the number of self-referenced URLs against all URLs in the Canonical section is important because it helps ensure everything is consistent, and help you quickly spot duplicate content issues.
You can check for self-referenced canonical in Screaming Frog by filtering the canonical URLs to identify those that self-reference.
Possible Fixes
- Missing canonicals: Add a <link rel=”canonical” href=”PREFERRED_URL”> tag to the head section of the page, specifying the preferred URL.
- Incorrect targets: Update the <link rel=”canonical” href=”INCORRECT_URL”> tag to point to the correct, intended URL.
- Multiple canonicals: Identify the most relevant URL and update all other pages with conflicting canonicals to point to the chosen one.
Pagination
Pagination is commonly used on blog pages or product category pages as a substitute to avoid multiple scrolling of pages or products. Simply put, pagination implies sectioning what should have been a one-pager into multiple pages to improve user experience.
For context, we will review how pagination has been well implemented on a particular website.
Things to note here
- Each paginated page must have a self-referencing canonical. For example, in a pagination of 10, page 1 URL needs to self-reference itself as the original, and page 2 must do the same until the tenth page.
Examples
- Page 1: <link rel=”canonical” href=”https://example.com/shop/”>
- Page 2: <link rel=”canonical” href=”https://example.com/shop/?page=2“>
- Page 3: <link rel=”canonical” href=”https://example.com/shop/?page=3“>
What to do
- Check for any issues with the canonicals, such as unlinked pagination URLs, multiple pagination URLs, and sequence errors.
Possible Fixes
- Unlinked Pagination URLs: Use the rel=”next” and rel=”prev” link attributes within the <head> section of each paginated page. These attributes link to the next and previous pages in the sequence, helping search engines understand the relationship between those pages.
- Multiple Pagination URLs: Ensure each page in the sequence has a single, self-referencing canonical tag pointing to itself. Avoid situations where multiple pages reference a different URL as they are canonical.
- Sequence Errors: Verify that the rel=”next” and rel=”prev” attributes correctly point to the adjacent pages in the sequence. Inconsistencies can confuse search engines about the pagination order.
Hreflang
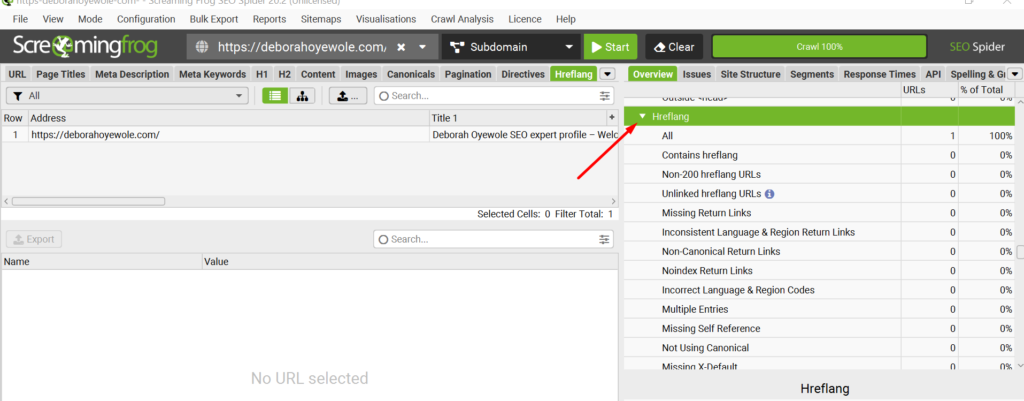
The Hreflang tag is an HTML attribute that tells search engines like Google which language and region a website is intended for. This is usually recommended for websites targeting multiple locations or languages.
Now, conducting a Hreflang audit means assessing content localization for websites targeting audiences in multiple locations. If you have a website with different versions catering to various locations and/or languages, then I recommend conducting a Hreflang review.
With the Hreflang tag properly implemented, search engines understand the relationship between the different language and regional versions of a website’s content.
Here’s an example of a website with content targeting different countries.
Now, if you’re reviewing a global website with multiple country or language targets, check the Screaming Frog Hreflang section for any Hreflang error such as non-200 Hreflang URLs, unlinked Hreflang URLs, Missing return links, inconsistent language & region return links, non-canonical return links, noindex return links, incorrect language & region codes, multiple entries, missing self-reference, missing X-default.
Structured Data
Structured data, such as schema markup, is another technical SEO issue you should pay attention to. Having structured data correctly implemented helps search engines better understand the content and context of your web pages, which can lead to enhanced search engine visibility and better-quality search results.
What to do
Screaming Frog can crawl your website and identify structured data issues or errors. You can find this information by navigating to the “Structured Data” tab, which will show you a detailed breakdown of the structured data on your pages.
Possible Fixes
Validate structured data: Ensure your structured data markup is properly formatted and adheres to the relevant Google guidelines.
Add missing structured data: Identify pages where structured data is missing and implement the appropriate schema markup to enhance the page’s search engine understanding.
Fix errors in structured data: Address any errors or inconsistencies in the structured data, such as incorrect property names, missing required fields, or invalid data types.
We just covered some common technical SEO problems you can diagnose using Screaming Frog, right? Now, let’s look into the next part – fixing content issues with Screaming Frog.
Common Content Issues and How to Fix Using Screaming Frog
Page Titles
In this section, you will see all the page titles and any errors such as missing, duplicate, over 60 characters, those below 30 characters, and those that are the same as H1.
These are valuable elements to dig into because search engines like Google use page titles to understand the content of a page. A well-crafted title can significantly influence how a page is indexed and ranked. So, while it isn’t a technical SEO element, it is critical.
What to do
- Review each tab, including missing, duplicate, over 60 characters, those below 30 characters, and those the same as H1.
- On the left-hand side, export all the affected URLs.
H2
H2, short for heading 2, is important in a website content layout. Though H2 isn’t a technical element, it does the following:
- aids in better content structuring, making it easier for humans and search engines to understand the page’s main topics.
- improves readability by breaking down text into manageable sections and help search engines identify important subtopics, boosting SEO.
- enhances user experience and contributes to better search engine rankings.
What to do
- Review the missing, duplicate, and multiple sections of the H2.
N.B. When reviewing the duplicate, study the URLs that SF has flagged as having duplicate H2s. For instance, if they are website placeholders or non-critical website sections like category pages, author pages, or tags, you may leave them as they are not critical to our website’s optimization. See an example here:
You’ll see that these are category and tag pages.
Also, it’s normal for a page to have more than one or two H2s. Therefore, you may ignore the multiple H2 section.
- Export affected URLs in the missing section.
Meta Descriptions
Meta descriptions are very important as they serve as a summary of what a page offers. That’s what searchers see first in search engine results under the page title. They should be a valuable and engaging anchor to your web page because they are crucial in improving click-through rates.
Although meta descriptions do not directly impact search engine rankings, well-crafted ones can drive more organic traffic to your site.
What to do
- Review the missing, duplicate, over 155 characters, below 70 characters, multiple, and outside <head> sections and export all of them.
Managing Your Technical SEO Report
There are several ways in which you can report your findings. Therefore, irrespective of your approach, ensure your audience can easily understand your recommendations as the SEO specialist.
Step 1: Collate Exported Errors
Create a spreadsheet to gather all your findings into one location. Categorize the issues by type (e.g., broken links, duplicate content) for better organization) into tabs. During your collation, review the URLs in each tab to ensure you’ve captured the right issues for the right URLs.
Step 2: Reporting Your Investigation
Summarize the findings in a report format, highlighting the most critical issues. Include screenshots and detailed descriptions of each issue to provide context.
I like to structure my audit with these key elements:
- User story
- Acceptance criteria
- Testing strategy
Here is an example of what it looks like.
You might be wondering, what exactly are these?
A user story is a short, descriptive narrative that explains the problem, the action plan, and the expected outcome for a developer or stakeholder.
For example, let’s say I want to improve the page load speed of my website. My user story would look like this:
“As the SEO Specialist, I want to reduce the page load time so that users have a better experience and the site ranks higher in search results.”
Acceptance criteria are the specific requirements that must be met for a user story to be considered complete.
So, for the example above, the acceptance criteria would be:
- The page load time is under 2 seconds.
- All images are optimized for the web.
- Unnecessary JavaScript and CSS are minified or removed.
- Browser caching is enabled.
The testing strategy is how you’ll check if the acceptance criteria are met after implementing the user story.
In our example, the testing strategy would be:
- Use Google PageSpeed Insights to test the page load time.
- Check that all images are compressed and optimized.
- Ensure that JavaScript and CSS files are minified.
- Verify that browser caching is enabled and configured correctly.
Let’s break it down further:
User story:
“As the SEO manager, I want to reduce the page load time so that users have a better experience and the site ranks higher in search results.”
Acceptance criteria:
- The page load time is under 2 seconds.
- All images are optimized for the web.
- Unnecessary JavaScript and CSS are minified or removed.
- Browser caching is enabled.
Testing strategy:
- Run Google PageSpeed Insights and record the load time.
- Open the page in a browser and check that the images are optimized.
- Review the source code to confirm that JavaScript and CSS files are minified.
- Use browser developer tools to verify that caching headers are present and correctly set.
Final Thoughts
The best time to start your SEO journey was yesterday; the next best time is now. This detailed step-by-step guide will be a resource as you begin your SEO journey using Screaming Frog. And remember, SEO is a continuous process, so don’t be afraid to keep learning!
Would you love me to work this out with you? Perhaps you’re caught up with other activities. Don’t worry; I can be of help here. Let’s talk!

